


news
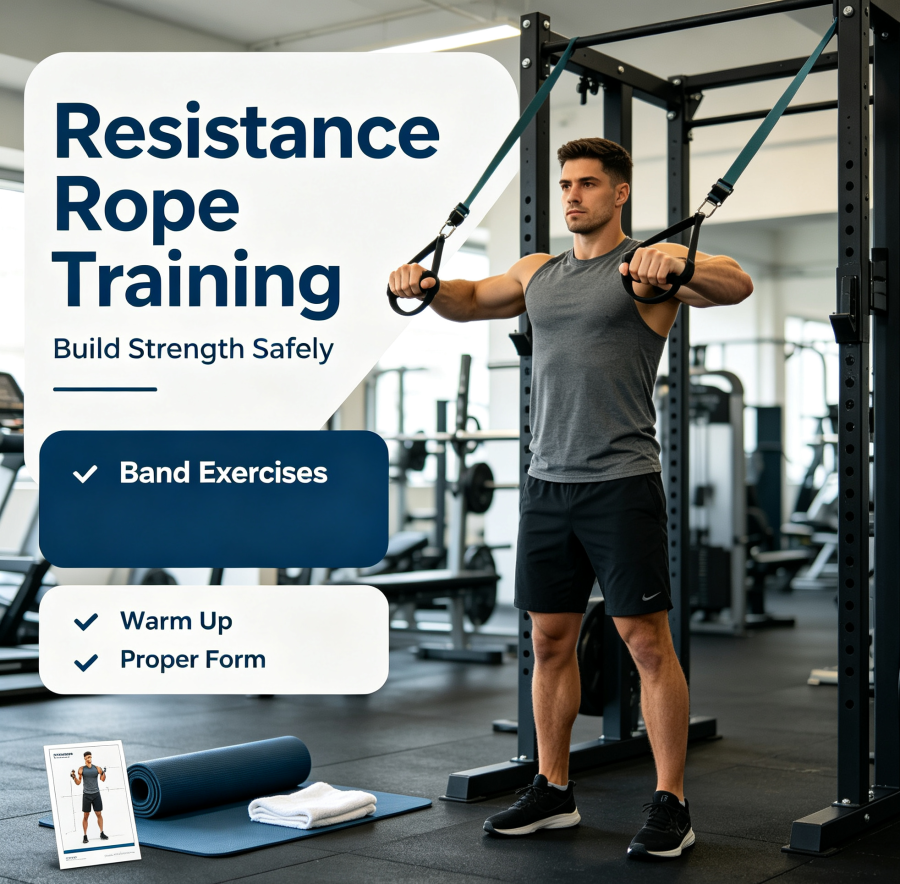
Resistance Rope Training 101: Benefits, Exercises, and Safety Tips
Do you want a full-body strength workout without a gym full of equipment? Maybe heavy dumbbells hurt your joints, or you do not have space for a bulky home gym. A resistance rope can solve that problem. It gives you the feel of a cable machine, but it is light, portable, and beginner-friendly.
Imagine this: It is 6 a.m., your living room is quiet, and you have 20 minutes before the day starts. You loop a resistance rope over the top of a closed door, step back, and feel smooth tension from your hands to your feet. No plates to load. No bench to set up. Just you, a rope, and controlled movement. That setup takes less than two minutes, and it works the same muscles you would hit on a gym cable tower.
In this guide, you will learn what a resistance rope is, why it works, how to choose one, and exactly how to use it safely. You will also get a simple 3-day starter plan you can begin this week.
Key Takeaways
- A resistance rope uses smooth elastic tension to challenge your muscles without heavy free weights.
- Anchor height and body angle change the muscles targeted, much like a cable machine at the gym.
- It is low-impact, portable, and good for full-body strength and core control.
- Start with controlled reps and a secure anchor. Add tension only when your form stays smooth.
What Is a Resistance Rope, and How Does It Work?
A resistance rope is a long, elastic or cord-based training tool. You pull or press against its tension to work your muscles. Most resistance ropes come with handles on both ends and a door anchor or strap. You attach one end to a sturdy point, then use the other end for exercise.
The rope creates smooth resistance through your full range of motion. There are no heavy plates to balance, so you can focus on control. Because the tension stays steady, your muscles work the whole time—not just at the top of a lift.
That continuous tension is the key reason the tool feels different from a dumbbell. With a dumbbell row, the load almost disappears at the top of the movement because gravity points straight down. With a resistance rope, the elastic keeps pulling no matter where your hands are. Your muscles never get a break mid-rep. That forces more muscle fibers to stay active, which is one reason even a light rope can feel challenging.
The Difference Between Resistance Ropes and Resistance Bands
A resistance rope is often thicker and longer than a flat resistance band. Many ropes use a cord-style design with a protective sleeve. Bands are usually flat loops or straight strips.
Both tools create tension, but a resistance rope often feels more like a portable cable machine. The handles and anchor let you set up pulling, pressing, and rotating moves with more control. You can attach it to a door, wall, or sturdy post, then adjust your body angle to change difficulty.
Think of it like the difference between a toy slingshot and a cable tower at the gym. A flat band snaps and wobbles. A resistance rope, especially one with a sleeve and solid handles, tracks more predictably. That matters when you are learning a new movement. Predictable tension lets you feel what "correct" feels like before you add more load.
Why This Training Style Is Worth Your Time
Resistance rope training is worth trying because it builds strength without beating up your joints. It also fits almost any space and schedule. You do not need a gym membership or a room full of gear. With a few anchor-point adjustments, you can train all major muscle groups, from your back and chest to your legs and core.
Low-Impact Strength Without Joint Strain
The smooth tension of a resistance rope is easier on your joints than heavy dumbbells. There is no sudden jerk at the start of a lift. You control the speed and range of motion from beginning to end.
That makes it a good option for beginners, older adults, or anyone with achy knees, wrists, or shoulders. You can still challenge your muscles, but with less impact on your joints. The rope supports full-body movement and forces your core to stabilize each rep.
Here is why that matters for someone who has never trained before. When you pick up a 20-pound dumbbell, your body has to handle 20 pounds at the exact moment gravity decides. That sudden load can surprise a wrist or shoulder that has not learned to brace yet. A resistance rope eases into the tension. The first inch of a pull is light. By the time the rope is fully stretched, your muscles and joints have already found their position. That ramp-up is gentler on connective tissue, which is often the weak link for new lifters.
A Portable Gym That Fits Any Space
You only need a door anchor and a few square feet of floor space. You can train in a living room, hotel room, or garage. The rope rolls up small, so it fits in a backpack or suitcase.
This portability helps you stay consistent. When travel or bad weather interrupts your routine, you can still get a full workout. A resistance rope gives you a home workout option that does not require a bench, rack, or heavy weights.
Picture a small apartment with a bed, a desk, and one open strip of floor next to the closet. A dumbbell rack would eat the walkway. A bench would block the door. A resistance rope fits in a shoebox under the bed. When you want to train, you anchor it to the doorframe, create tension, and stand in that one strip of floor. No rearrangement needed. That simplicity makes you more likely to train on days when motivation is low because the setup feels like almost no effort.
How to Choose the Right Resistance Rope for Your Goals
Choosing a resistance rope does not need to be complicated. Focus on three things: resistance level, material quality, and handle or anchor safety.
Resistance Levels and Materials
Start with a resistance level that matches your current strength. If the rope is too heavy, your form will break down. If it is too light, you will not feel enough tension. Many beginner sets include multiple ropes or detachable cords so you can adjust the load.
Look for durable, high-quality latex or rubber cord material, preferably with a nylon safety sleeve. The sleeve protects the cord from wear and protects you if it snaps. Check that the stitching and connection points feel strong before you buy.
For a true beginner, "too light" is usually safer than "too heavy." You can always step farther back to increase tension on a lighter rope. But you cannot make a rope that is too heavy feel lighter. If you struggle to complete eight controlled reps with your first rope, you need a lighter option. That is not a failure. It is information. Trainers use this same principle with dumbbells: pick a load you can control, not one you can barely survive.
Handles, Anchors, and Safety Features
Choose handles that feel comfortable and secure in your hands. Foam or rubber grips help prevent slipping. The door anchor should be thick and sturdy, with a wide loop or strap that fits firmly over a solid door or post.
Check the length, too. You need enough rope to step back and create tension without hitting walls or furniture. A rope that is too short limits your range of motion. A rope that is too long may make setup awkward. Match the length to your workout space.
Beginner Exercises You Can Do With a Resistance Rope
You can translate many common gym exercises into resistance rope setups. Start with these beginner-friendly moves. Focus on slow, smooth reps.
Upper-Body Pulls and Rows
Resistance rope row: Anchor the rope at chest height. Hold a handle in each hand. Step back until the rope is taut. Keep your chest tall and pull the handles toward your ribs. Squeeze your shoulder blades together, then slowly return.
Anchor height changes the target. A chest-high anchor works the middle back. A low anchor pulls more from below, which shifts focus toward the upper back. A high anchor creates a downward pull, similar to a lat pulldown.
Here is a concrete way to feel the difference. Set the anchor at chest height and pull straight back. You should feel the work between your shoulder blades. Now lower the anchor to knee height and pull toward your hips. The line of pull changes, and you feel more work in your upper back and rear shoulders. Raise the anchor above head height and pull down toward your chest. Now your lats—the muscles under your armpits—take over. You are doing three different exercises with one rope. That is the same concept a personal trainer uses on a cable tower, but you can do it in a doorway.
Chest press: Anchor the rope behind you at chest height. Face away from the anchor. Hold the handles at chest level and press forward until your arms are straight. Keep your core tight and your ribs down. Return slowly.
Pull-aparts: Hold the rope with both hands at chest height, arms straight in front of you. Pull the rope apart until your arms open wide. Squeeze the back of your shoulders, then return with control.
Lower-Body and Core Movements
Squat-to-row: Anchor the rope low, near the bottom of a door. Hold the handles and step back. Lower into a squat while keeping tension on the rope. As you stand, pull the handles toward your ribs in one smooth row. This works your legs, back, and core together.
Standing core rotation: Anchor the rope at chest height. Stand sideways to the anchor. Hold one handle with both hands. With arms straight, rotate your torso away from the anchor. Control the return. This builds rotational core strength without heavy twisting or strain.
Adjust your foot position to change difficulty. Step farther back for more tension. Bring your feet closer for less. You can also change your body angle. Leaning slightly back during rows increases the challenge because your core works harder to keep you stable.
Common Mistakes That Sabotage Your Workouts
Avoid these errors to stay safe and get better results.
Using too much resistance too soon. If you cannot control the rope, your form breaks down. You may jerk the handles or lean too far back. Start lighter than you think. Smooth reps build muscle better than sloppy heavy pulls.
Anchoring to weak points. Never anchor to a flimsy door handle, a worn hinge, or a lightweight door. The anchor must sit on a solid, closed door or a sturdy post. Check every connection point before each set. If anything looks frayed or loose, stop and fix it.
Here is why this mistake is so common. New lifters often feel strong and skip the safety check. They anchor to a closet knob or a hollow bedroom door and start pulling hard. The anchor slips, or the door flexes. Best case, the workout stops. Worst case, the rope snaps back toward your face. A solid, solid-core door with the anchor strap placed over the top or side—then the door fully closed and locked—is the standard setup. Check it every time, even if you checked it yesterday.
Rushing reps. Fast, bouncy reps waste the benefit of the rope. The tension should stay steady. Slow down. Take about 2 seconds to pull or press, pause briefly, and take 2–3 seconds to return.
Ignoring the return phase. Most beginners focus on the pull and let the rope snap back. That throws away half the exercise. The return, or eccentric phase, is where a lot of muscle growth happens. If you let the rope yank your arms back, you train only half the movement. Control the return just as much as the pull. Count "one, two, three" on the way back. If you cannot slow it down, the resistance is too high or you stepped too far back.
Your First-Week Starter Plan
Use this plan to build the habit. The goal is not to exhaust you. The goal is controlled, repeatable movement.
A 3-Day Beginner Schedule
- Day 1 – Pull Focus: 2 sets of 10–12 resistance rope rows, 2 sets of 10–12 pull-aparts, 2 sets of 8–10 squat-to-rows.
- Day 2 – Push and Core Focus: 2 sets of 10–12 chest presses, 2 sets of 8–10 standing core rotations per side, 2 sets of 10–12 pull-aparts.
- Day 3 – Full-Body Mix: 2 sets of 10 squat-to-rows, 2 sets of 10 chest presses, 2 sets of 8 rotations per side.
Rest about 60 seconds between sets. Move slowly and stay in control.
Here is how a real first session might go. You anchor the rope at chest height, set a timer for 20 minutes, and complete Day 1. The first set of rows feels awkward. By the second set, you find a rhythm. Between sets, you check the anchor and adjust your stance. You finish all three moves in about 15 minutes. The next morning, your mid-back feels slightly sore—not sharp pain, just a sign the muscles worked. That feeling becomes your cue to repeat the session two days later.
Simple Progression Rules
Start with 2 sets of 10–12 reps per move. Only increase resistance or reps when the last 2 reps still look and feel smooth. If you can complete 12 reps with perfect control on both sets, add 2 more reps next time. When you reach 15 smooth reps, step farther back or move to a stronger rope.
Do not rush progression. Small, steady increases in tension and range of motion build strength without joint pain.
Safety and Medical Disclaimer
When you train with a resistance rope, listen to your body. Stop any movement that causes sharp pain, and adjust your form before continuing. This guide is for general information only and is not medical advice. Talk to a doctor or physical therapist before starting a new exercise program, especially if you have an injury, joint condition, or other health concern.
Frequently Asked Questions About Resistance Rope Training
What is the difference between a resistance rope and resistance bands?
A resistance rope is usually a thicker, cord-style tool with handles and a door anchor, so it feels more like a portable cable machine. Flat resistance bands are often loops or strips and can snap or wobble during pulls. The rope's more predictable tension makes movements easier to control when you are learning.
What are the best resistance rope exercises for beginners at home?
Start with a chest-height resistance rope row, pull-aparts, and a chest press for upper-body work. For lower body and core, try a squat-to-row and standing core rotation. These moves use simple door anchor setups and can be adjusted by changing anchor height or stepping farther back.
Is resistance rope training good for joint pain or older adults?
Yes, it is low-impact because tension builds smoothly without the sudden load of free weights. You control the speed and range of motion, which can be easier on wrists, shoulders, and knees. If you have an injury or medical condition, check with a healthcare professional first.
Can you build muscle with resistance ropes instead of weights?
Yes, if you use progressive overload by gradually increasing tension, reps, or time under tension. The continuous elastic tension keeps muscles working through the full movement, including the return phase. Muscle growth depends on consistently challenging the muscles more over time, not on the tool itself.
How do you safely anchor a resistance rope at home?
Use a solid, closed door or sturdy post, and place the anchor strap over the top or side of the door before locking it. Never anchor to door handles, hollow doors, or worn hinges. Check the anchor and rope for fraying or looseness before every set.
Start the 3-day beginner resistance rope plan this week. Complete the first workout, note how your body feels, and keep your reps slow and steady. That first session is the hardest step—after it, the habit starts to build itself.
0users like this.
